Publishing Your Web Site with Expression Web 4
New Publishing Features to Expression Web 4.0 include:
- The ability to exclude complete folders from publishing rather than just files.
- The ability to easily Publish Current Page
Exclude from Publishing
To mark files that you do not want to publish, do one of the following:
- In the Folder List panel, right-click the file or folder that you do not want to publish, and then click ‘Exclude from Publishing.’ If you mark a folder as exclude from publishing, ALL files within that folder are also marked ‘Exclude from Publishing.’
- In the left-hand pane of Publishing view, right-click the file that you do not want to publish, and then click ‘Exclude from Publishing’.
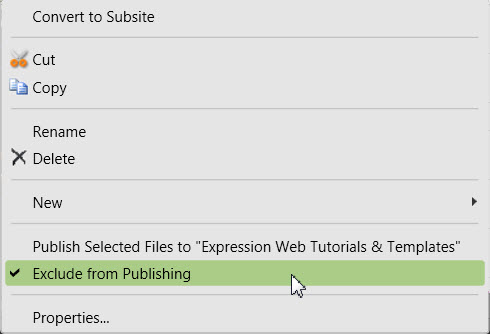
Fig 1: Right click > Exclude from publishing
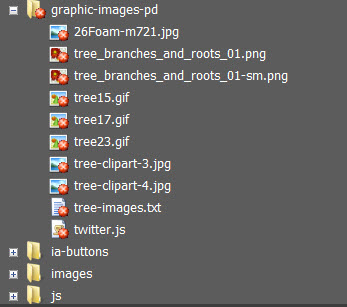
Fig 2: Folder/FIles marked Exclude from Publishing
Publish Current File
There is now an option to ‘Publish Current File.’ You must have a page open for this option to be available. To publish the current file, do one of the following:
- From the ‘Site’ menu, click ‘Publish Current File.’
- From the keyboard Cltrl + Shift + U
- From the ‘Standard’ toolbar, click the ‘Publish Current File’ icon

Migrate Existing File Definitions to Expression Web 4
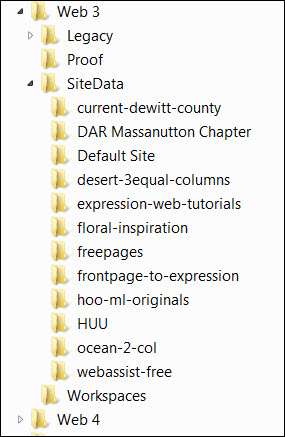
Each time I install a new version of Expression Web, I always have to re-enter all of the publishing information for each site. Wouldn’t it be nice if I could just copy them for one version to another? Now you can migrate existing file definitions from version 3 to version 4. You will need to copy the SiteData directory (or just certain folders from that directory)
C:\Users\UserName\APPDATA\Microsoft\Expression\Web 3\SiteData
to the equivalent Web 4 location which for me is
%APPDATA%\Microsoft\Expression\Web 4\SiteData
I copied the folder for one of my Expression Web 3 sites that I had not yet set up in Expression Web 4 and it works perfectly. Quite a time saver!
View Screenshot SiteData folder contents
Publishing Your Website
Now that you have finished designing your site you will need to publish it for the world to see. The screenshots for this tutorial were done with a system running Windows Vista Ultimate and Expression Web 4.0. Yours may look slightly different. Expression Web supports several different publishing scenarios.
Step 1: Open the website on your computer in Expression Web. Make sure you have saved all of your pages. You will receive a warning if you have not once you start the publishing process.
Step 2: If you didn’t set the options for your site while developing your site, check your settings before attempting to upload/publish. Site > Publishing Settings > Add/Edit .
FREE Setting up Expression Web Ebook by Tina Clarke.
Step 3: Recalculate Hyperlinks: Tools > Recalculate Hyperlinks.
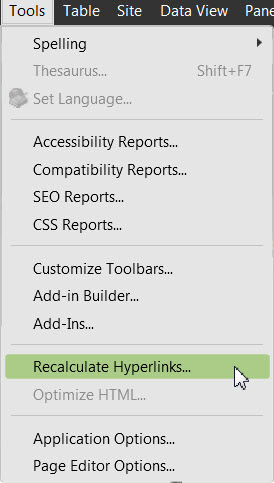
Fig 3: Tools > Recalculate Hyperlinks
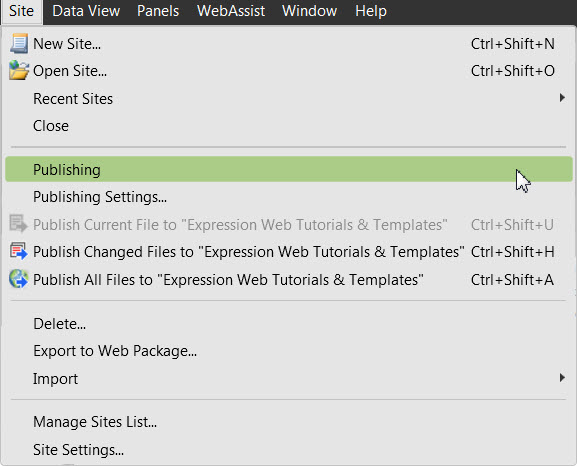
Step 4: Click Site on the menu, select Publishing
View Screenshot Site Publishing menu
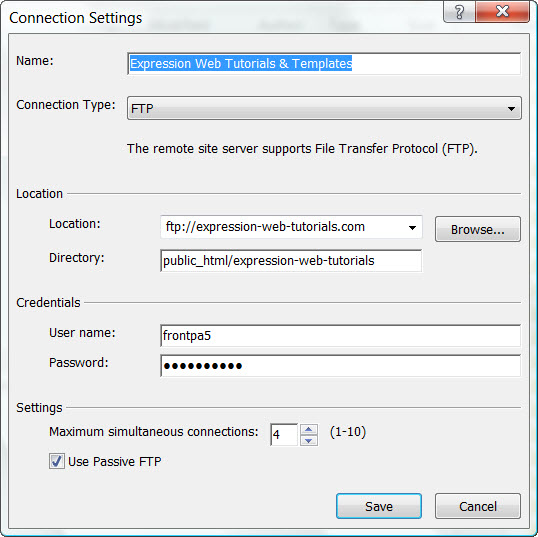
Step 5: If this is the first time you have published this site, you will receive the message 'Add a publishing destination.' Click the message and the Connection Settings dialog box will appear.
There are several things to do on the dialog box that pops up.
- "Name" - Type the name of the site, i.e., Genealogy Web Creations
- "Connection Type" - select FTP, SFTP, FTPS, FrontPage Server Extensions, WebDav, or File System.
- "Location" - type the Internet address, including the protocol, of the remote website that you want to publish folders and files to — for example, ftp://www.your-domain.com OR http://www.your-domain.com.
- "Directory" — the folder/directory on the server you are publishing the files to.
NOTE: In the case of 1and1 Linux servers, it would be whichever directory you have pointed that domain to.
NOTE: In the case of BlueHost, you may enter your domain name or the IP address of your server. Enter your ftp directory. If this is your main domain (the domain you opened your account with) enter public_html. If you are publishing to an addon domain, you would type public_html/addon-domain-directory.
- "Credentials User name" - your User Name
- "Credentials Password" - your password
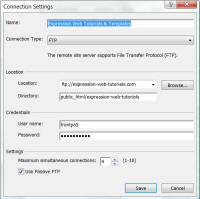
Fig 4: Connection Settings (click thumbnail for larger image)
Click 'Add.' At this point you are automatically connected to your server.
If you have already set up your 'Publishing Setting,' you will receive the message 'Connect to current publishing destination.' You can click the message OR you can use the Connect To button on the Site View tab.
![]()
Fig 4: View Connect To Bar (click thumbnail for larger image)
Once connected, click the 'View' dropdown and select one of the following:
- Selecting either of the 'All Files' views will publish all files.
- Selecting the 'Changed Files' view will publish just the changed files.
Step 6: You will see your website (on your computer) in the left window.
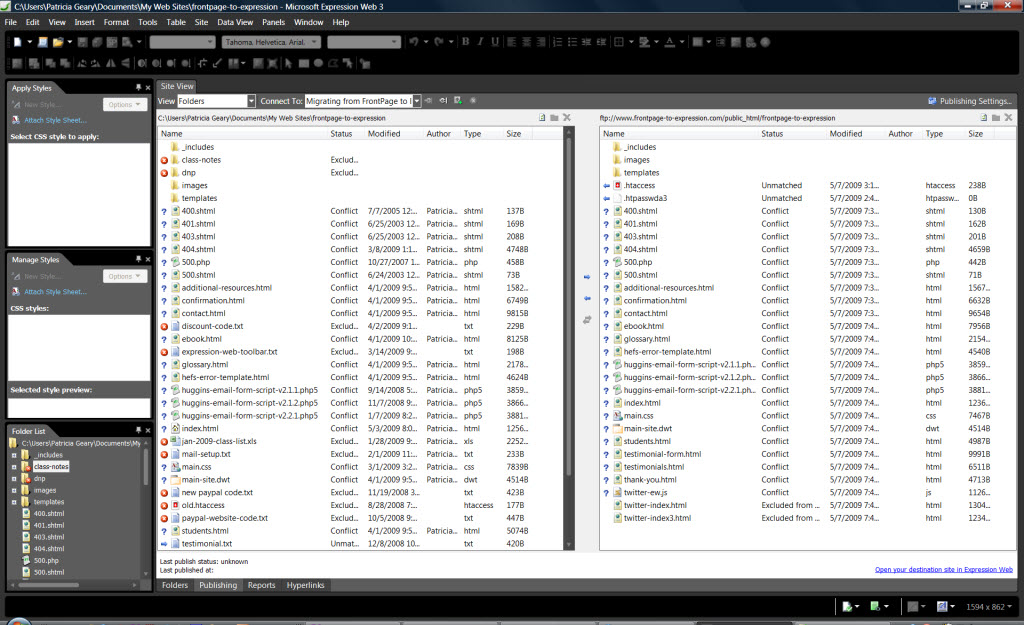
Fig 5: Local and Remote Website (Click thumbnail to view larger image.)
Depending on what you are trying to do:
Choose from the View dropdown which files you want to publish. There are three arrows between the windows. If you want to move just a file or two, you can highlight it, then click the arrow to copy just that file or files.
![]()
Fig 6: Publishing
The top arrow 'Publish files to the destination site' is used most often. It publishes your choice of files from your computer to your server. Keyboard shortcut is Ctrl + Alt + P.
The middle arrow 'Get files from the destination site' is used if you happen to lose your site on your computer or damage the files, you could use this to download the site or a file from server to your own computer. Keyboard shortcut is Ctrl + Alt + G.
The bottom double arrows 'Synchronize files' - compares the two sites and moves the data back and forth until they match. Use this with caution. Keyboard shortcut is Ctrl + Alt + Y.
OR
Step 7: Using the ‘Standard’ toolbar,' click the button you wish for the appropriate publishing operation.
![]()
Fig7: Standard toolbar publishing options
From Left to Right:
Publish the current File
Publish all changed files to your site
Publish all files to your site
Get all changed files in your site
Get all files in our site
Once you start the publishing process, you will see your files being transferred. When complete, you will get a message that your file is finished uploading.

Fig 7: Successful Publish
You can also choose to 'view your publish log files.'
The next time you publish your site, this process will compare the server site with what is on your computer. If there are files on the remote server that you've deleted from the web on your computer, a message box may pop up asking you if you want to delete them. If you are sure they are no longer needed, answer OK. If not, do some checking.
If you have problems publishing, check the following:
- Did you type your UserID and password correctly? Remember it's caSE seNSitiVE, so must be exactly what you were given by your host.
- Did you type the ftp or http address correctly?
- If you have a Firewall installed, did you give Expression Web the permissions it needs to publish?
- Spaces in file names MAY cause problems in uploading files. It is best NOT to use them. Use a hyphen or underscore to separate the words publishing-website.html or publishing_website.html NOT publishing website.html.
Once you have finished publishing your site, check online to make sure things are working as you expect them to.

Copyright © 2010 Pat Geary of Expression Web Tutorials and Templates, All Rights Reserved
Revised and Updated July 2010
Expression Web 4.0 Tutorials 2nd Edition from Install to Publish, a FREE EBook by Pat Geary.

Expression Web has a group on Facebook. If you are a FB user, come join us.

Disclosure: This is an affiliate link, which means that if you visit Bluehost.com through this link and purchase this product, I’ll get a commission.

April 2007 - April 2013