Adding Horizontal Top Navigation to Webpage Layout
Now that you have created a basic layout for your webpage, it is time to add some navigation to it. First. I will show you how to add a horizontal menu for your top navigation. In a separate tutorial we will add a vertical menu on the left. You may choose to use either or both of the menus.
Add and style the top menu
As you develop your menu, make sure you preview it in both Internet Explorer and Firefox. You will also need to check it at various resolutions to make sure you do not add too many links to the menu. You might try viewing it using the new 'SuperPreview' feature.
Create the menu list
Create a simple bulleted list for your top menu. Remember you are going to be limited on the number of items to include so that you menu will not "break" when resized. In 'Design' or 'Code' view, in your webpage, place your cursor where you want to create a list, and then do one of the following:
- On the 'Common' toolbar, click Bullets
 , or on the 'Formatting' toolbar, click the Style box, and select Unordered List.
 - Drag the page you want to include as a menu item from the 'Folder List' panel to the first bullet. Hit 'Enter' to add a new list item. Using this method will create your hyperlinks as you go along. If you have no pages as part of your website but would like to create the menu items and pages as you go, you can follow Creating a New Page from Hyperlink Properties.
- OR for each item or line of text that you want in the list, type the text, and then press ENTER to add a bullet to the list. If you use this method, you will need to create the hyperlinks to the menu items.
To create or modify a hyperlink
- In your webpage, in 'Design' view or 'Code' view, do one of the following:
- Select the item that you want to use as the hyperlink. Press Ctrl + K OR right click and select hyperlink.
- OR In either the 'Common' or the 'Standard' toolbar, click Insert Hyperlink.
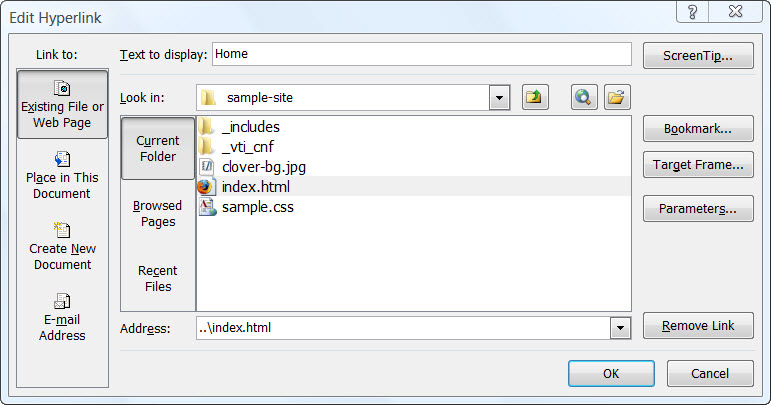
- In the 'Insert' or 'Edit' Hyperlink dialog box, do the following:
- Text to display: Type the text you want to display as the menu item
- Existing File or Web Page: In the Address box, browse the the file you want to link to OR Copy and Paste the URL of the webpage you wish to link to.
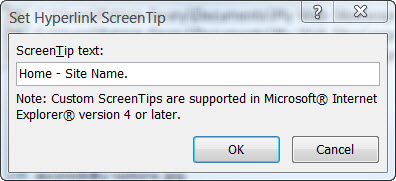
View Screenshot - Click 'Screen Tip.' Type a brief description of the link. For SEO purposes, use the title of the page.
View Screenshot - Continue this procedure until you have added all of your top menu links.
If you view your source code, it should look something like the following:
<ul>
<li><a title="Home - Site Name." href="index-two.html">Home</a></li>
<li><a title="Menu Item." href="index.html">Menu Item</a></li>
<li><a title="Menu Item." href="index.html">Menu Item</a></li>
<li><a title="Menu Item." href="index.html">Menu Item</a></li>
<li><a title="Menu Item." href="index.html">Menu Item</a></li>
<li><a title="Menu Item." href="index.html">Menu Item</a></li>
<li><a title="Menu Item." href="index.html">Menu Item</a></li>
<li><a title="Menu Item." href="index.html">Menu Item</a></li>
</ul>
Of course, each menu item would hyperlink to its own page NOT the index.html page. This is just an example.
Adding styles to the menu
- Open your index.html page in 'Design' view.
- From the 'Manage Styles' panel > right click #top-nav > Modify Style.
- Select the 'Position' Category and REMOVE 50 from height.
- Select the 'Border' Category and change the width to thin.
- Select the 'Box' Category and uncheck padding: Same for all > top: 10px bottom 10px.
- From the 'Manage Styles' or 'Apply Styles' panel click 'New Style'. In the New Style dialog box, type or select the following:
- Selector: #top-nav ul
- Define in: select Existing style sheet from the dropdown. Select the style sheet.
- Block: text-align: center
- List: list-style-type: none
- Box: margin: 0px; padding: 0px
- From the 'Manage Styles' or 'Apply Styles' panel click 'New Style'. In the New Style dialog box, type or select the following:
- Selector: #top-nav ul li
- Define In: select existing style sheet from the drop down. Select the style sheet.
- Layout: display: inline
- From the 'Manage Styles' or 'Apply Styles' panel, click 'New Style.' In the New Style dialog box, type or select the following:
- Selector: #top-nav ul li a
- Define in: select Existing style sheet from the dropdown. Select the style sheet.
- Font: color: #ffffff
- Background: background-color: #006600
- Box: untick padding Same for all > top and bottom .2em > right and left 1em.
- From the 'Manage Styles' or 'Apply Styles' panel click 'New Style.' In the New Style dialog box, type or select the following:
- Selector: #top-nav ul li a:hover
- Define in: select Existing style sheet from the dropdown. Select the style sheet.
- Font: color: #000000
- Background: background-color: #CCFFCC
- Border: border: 1px #99BF99 solid;
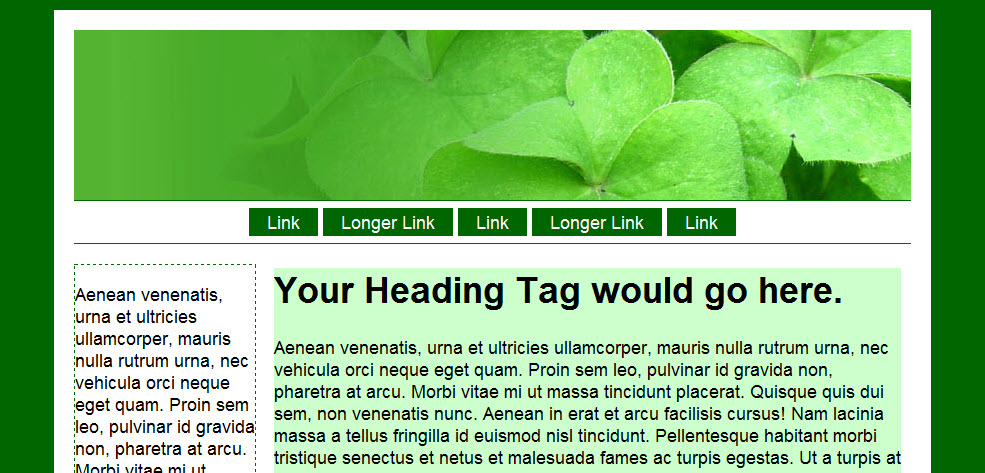
- Save your page and Preview in Browser. View Screenshot
Converting Your Menus to Include Pages
Create a new folder for the includes. Click 'Site View' tab. > Click 'New Folder' icon. ![]() > Type _includes as the name of the folder.
> Type _includes as the name of the folder.
- Click the 'New Document' icon. Save the page with the name top-menu.html in the _includes folder.
- Copy and Paste the menu list from your index.html page into the new top-menu.html page.
- Insert the top-menu.html into the index.html as an include.
- Using Code Snippets to Insert Include Pages
- Use the 'Standard Toolbar' to insert your include page.

Standard Toolbar

Navigation Resources
- Website Navigation - Website Navigation Structure
- Navigation Menu - Creating A Navigation Menu
- Website Navigation
Whatever your final choice of navigation is, it should be a consistent navigation scheme from page to page throughout your site. This helps the website visitor learn your website navigation system.
CSS Menu Resources
- CSS Library Horizontal CSS Menus
- CSS Library Vertical CSS Menus
- CSS Play Menus
- CSS Express Drop-Down Menus - by the folks at ProjectSeven. This is my absolute favorite for a CSS dropdown menu.
You will also need to make sure that whichever menu system you use, that it renders in all browsers.
NEXT STEP: Adding Vertical Navigation to Webpage Layout ![]()

Copyright © 2009 Pat Geary of Expression Web Tutorials and Templates, All Rights Reserved
Revised July 2010
Expression Web 4.0 Tutorials 2nd Edition from Install to Publish, a FREE EBook by Pat Geary.

Expression Web has a group on Facebook. If you are a FB user, come join us.

Disclosure: This is an affiliate link, which means that if you visit Bluehost.com through this link and purchase this product, I’ll get a commission.

April 2007 - April 2013