Installing a WordPress Blog Using SimpleScripts
A number of years ago I moved my hosting to BlueHost. My domains included four WordPress blogs. In the past, I have installed a WordPress Blog manually. This time I decided to give Simple Scripts a try since it was offered by BlueHost. SimpleScripts was introduced by BH and MAY be available with other hosting packages.
What is SimpleScripts? SimpleScripts is a one-click installation and upgrade utility for the web's most popular applications including Blogs, Photo Galleries, Online Stores, Forums, Wikis, and more.
Installing a WordPress Blog on BlueHost
Step 1: Sign on to your BlueHost control panel > Scroll down to Software / Services > Select SimpleScripts > You will be redirected to the SimpleScripts page.
NOTE: SimpleScripts and WordPress are also available under the 'SimpleScripts Installations' tab as well as 'Site Builders' tab.
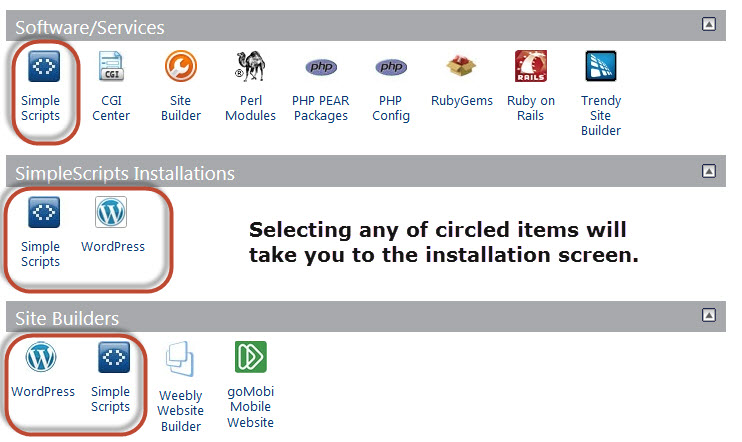
Any selection will take you to the next screen.
Step 2: The next screen will take you to the scripts panel. The default tab is 'My Installs.' The top of the screen will show you any current installations and the bottom will show what programs are available to install using SimpleScripts.
Under Blogs > Select WordPress
The WordPress Panel will give you information and options which include:
- A description of the WordPress program with screenshots and License Information.
- The current version of WordPress and the release date.
- Any current installations of WordPress you may have already installed will be listed under the My Installs tab.
- Installation Options > Click Install.
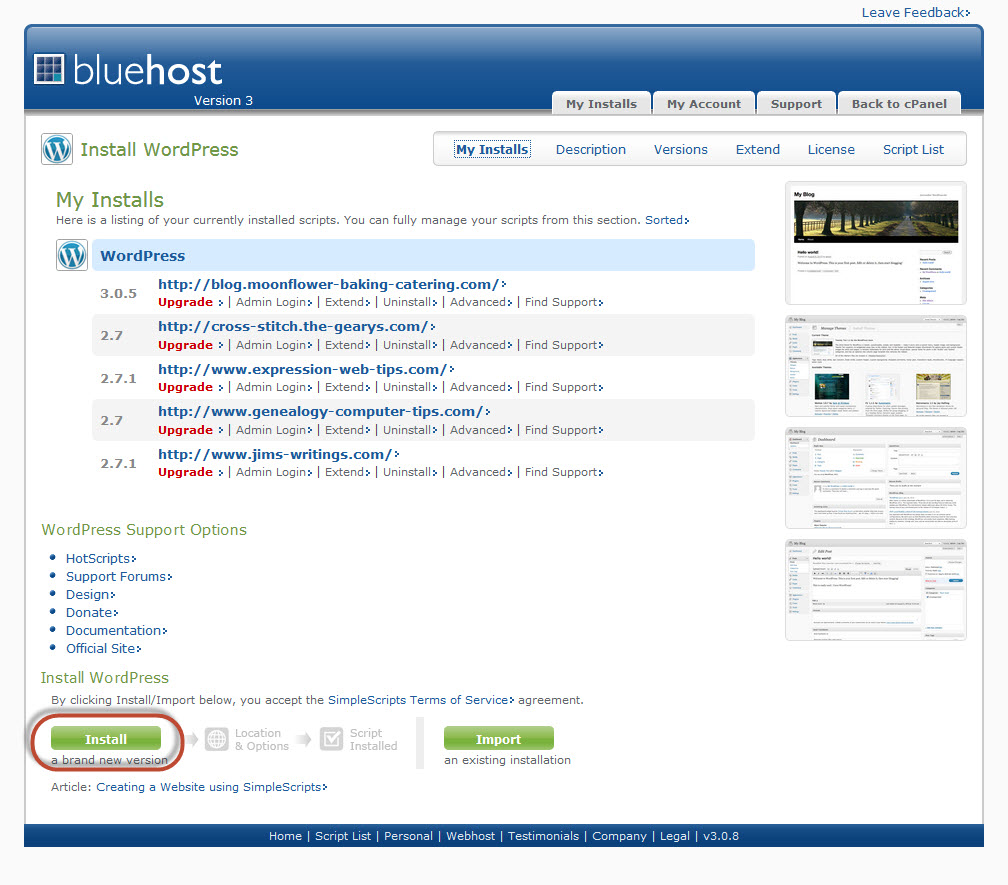
Step 3: The next screen gives you the opportunity to select your install options.
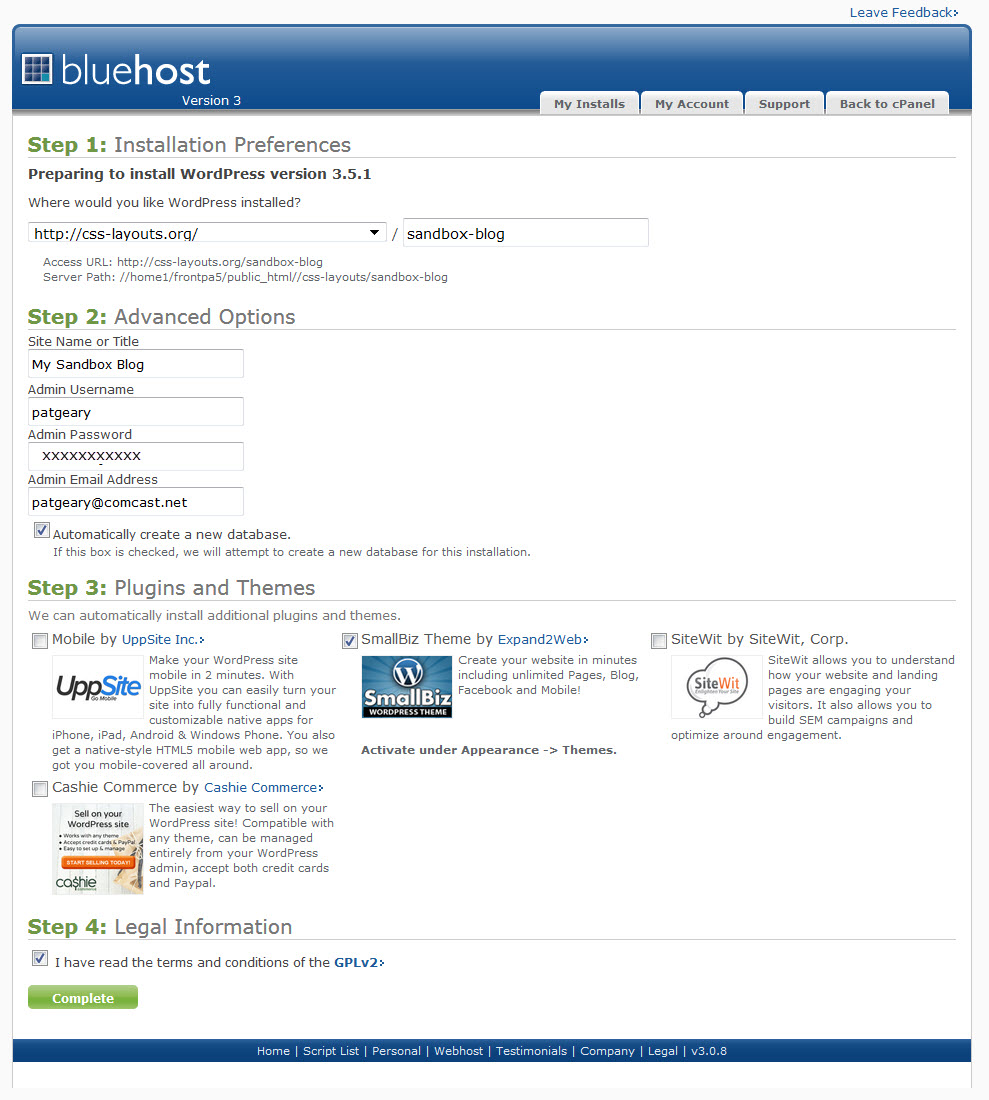
- Step 1: Installation Preferences:
- Shows which version of WordPress being installed > Will show the current stable version.
- Select where you want WordPress installed NOTE: You can select a domain or subdomain that you currently have.
- Step 2: Advanced Options:
- Site Name or Title: Choose a name for your new site.
- Click to display the additional options which include administrative
privileges, database configuration, and more. Changes are optional.
- Admin Username - Do NOT use Admin as your username
- Admin Password
- Admin Email Address
- Tick the box to automatically create a new database.
- Step 3: Plugins and Themes
- All are checked by default. Untick any you DO NOT want installed.
- Step 4: Legal Information
- Tick the I have read the Terms and Conditions Box > Click Complete
Step 4: You will see a progress bar then the message "Your Wordpress installation has completed successfully." The next screen will give you your access information which you should save. You will also received an email from SimpleScripts with your access information. SAVE IT! KEEP IT SAFE. Your WordPress installation is complete.
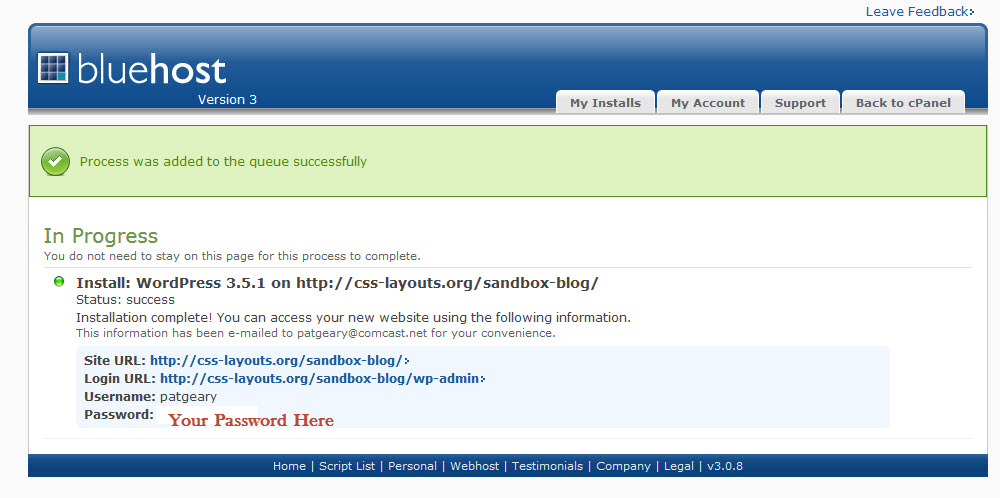
Configuring Your WordPress Blog
Step 5: Login to your newly created blog with the access information you were just given. The Dashboard will be the screen you see.
Make sure that the password you create is a STRONG one. If not, you may want to change it.
The choice is entirely up to you BUT a strong password will be better protection for you.
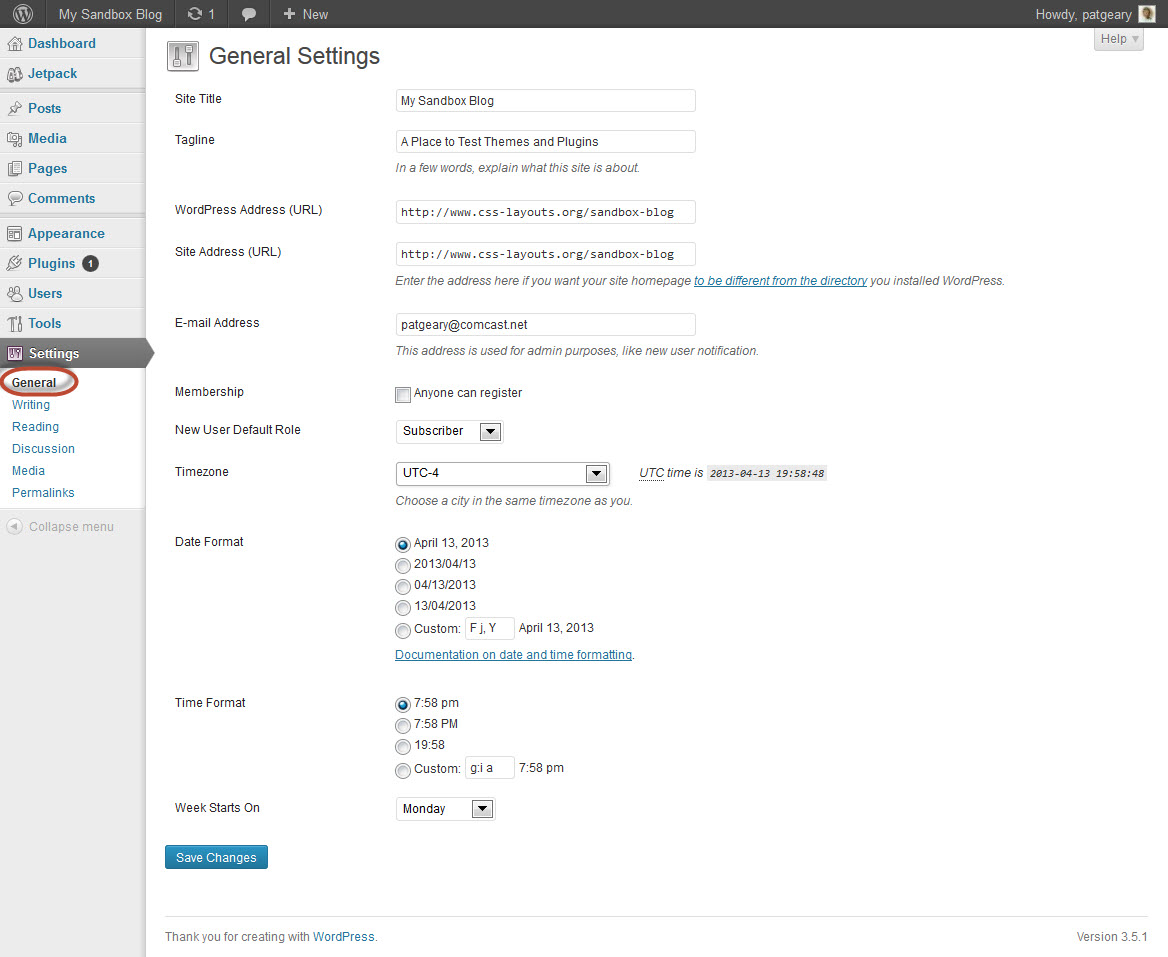
Step 6: On the left hand side navigation > Select Settings (you may need to expand the menu) > Select General. Make any changes you want to the following options:
- Blog Title - The name of your blog
- Tagline - A brief description of your blog
- WordPress Address - The location of the WordPress core files
- Blog Address - The URL location of the blog
- E-mail Address - A valid e-mail address that you control
- Membership - Use this to determine if you allow new users and how they are handled. NOTE: Since this particular blog is just for testing, I did NOT check anyone can register.
- New User default Role - Determines the capabilities of new users
- Timezone (Eastern Daylight Savings Time is UTC-4)
- Date Format
- Time Format
- Week Starts On - select day of the week you want
Click Save Changes button
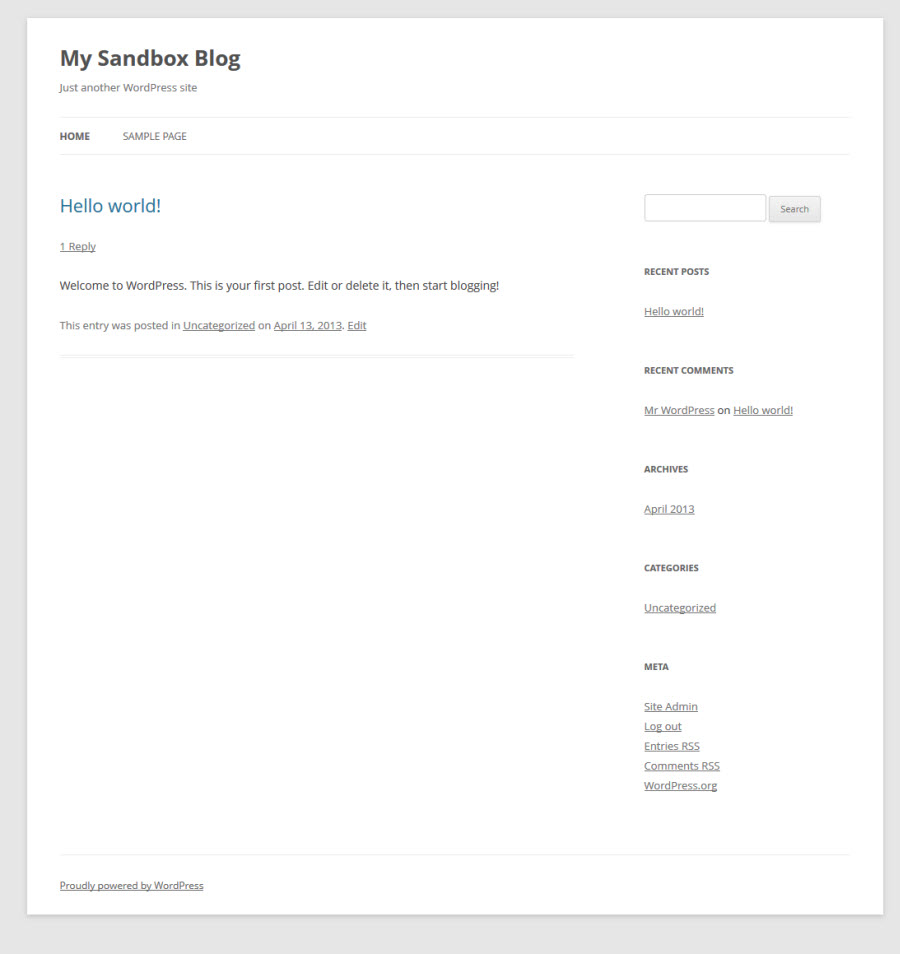
Step 7: Your new blog has the default theme of Twenty Twelve (as of this writing.) You can change and/or customize the default theme.
![]() View Screenshot (default theme without customizations)
View Screenshot (default theme without customizations)
Now that you have your WordPress Blog installed, you can download a free copy of Launching a WordPress Blog EBook and learn how to set up your blog. NOTE: While the eBook gives you good information, it is in need of a revision.
If you are moving a blog from one host to another host, the newest versions of WordPress will allow you to export your data from your old blog and import it into your newly installed blog.
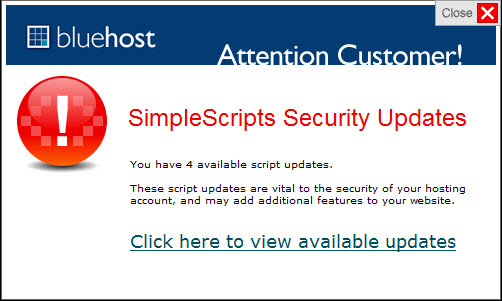
Once you have installed WordPress using SimpleScripts, you will received a Security Update Notice when you sign into your Control Panel to the effect of updating your simple scripts installations to the current versions. DO NOT USE THIS METHOD to update your installations. There is an auto upgrade feature in the current versions of WordPress. You can turn off this notification by going to the SimpleScripts screen and unticking Enable Upgrade Notifications from the My Accounts tab.
WordPress Resources

Tutorial Revised and Updated April 13, 2013
Expression Web 4.0 Tutorials 2nd Edition from Install to Publish, a FREE EBook by Pat Geary.

Expression Web has a group on Facebook. If you are a FB user, come join us.
Disclosure: This is an affiliate link, which means that if you visit Bluehost.com through this link and purchase this product, I’ll get a commission.

April 2007 - April 2013